I'd love to say that things at That Village House have just been SOOO busy that I haven't had time to blog. Really, I've just had a lack of motivation! That changed the other day when I re-stumbled upon Ana White's website. This lady is amazing and if I'm ever in Alaska I will have to find her and give her a great big hug for being so generous with her talent.
Soon we will be putting our two girls in one room and our son will have his own. This creates a problem when it comes to beds. Our matching beds are more "boyish" and our single bed is more "girlish"... see the issue here? SO, I showed by hubby the plans on Ana's website for the Farmhouse Twin bed and convinced him that we could do it! To my surprise he said, "sure, let's start tomorrow". So, Saturday afternoon we gathered all our materials (which included a new/used Mitre saw he's been wanting) and got to work. Our goal was to finish the headboard... check!
Later that weekend, we got to work on the footboard.
I'm so excited! I am so proud of us. I can't believe we actually BUILT A BED!! Of course it's not perfect. And I'm still not technically finished. I will need to go back and fill in all the nail and screw holes, sand, prime and paint it. Then we will decide whether to use a bed frame or build the rails like Ana's plan shows.
The wood material cost us just under $50. We had to buy some nails, screws, wood filler, and glue so that brought our total to around $80. Those things will be used for the next project (which I've already got brewing in my mind!!).
Headboard
The footboard
And so you can sort of see how it will be layed out (and the nastiness that is my garage!!)
We hope you had a blessed Easter.
“Why do you look for the living among the dead? He is not here; he has risen!" Luke 24:5b,6a
Linked Here:
The DIY Show Off
Making the World Cuter
C.R.A.F.T.
Pages
▼
Monday, April 25, 2011
Friday, April 8, 2011
Accessory Challenge
Are you tired of your accessories??
Instead of buying new ones, just try moving them to new locations around your house.
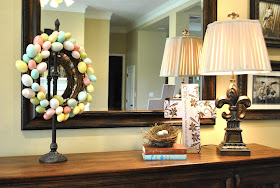
This was my coffee table yesterday, covered with just about every accessory I own. I cleared end tables, bookcases and my fireplace with the intent to not put anything back in it's same location. It's harder than you think!
I learned a few things in the process...
1. Mix colors & textures to add interest.
2. Use varying heights, even if you have to build things up.
3. Keep things fresh by keeping up with the holidays.
4. Fight the urge to make things symmetrical.
5. And place your favorite things in places that you see the most.
Are your accessories gathering dust? Move them around.
What can it hurt??
Wednesday, April 6, 2011
Embracing Blue
Hi everyone!! It's so great to be back!!
Thanks for your thoughts and prayers over our newest little one, Davis. He's sweet & perfect and keeps me busy, hence my lack of blogging!
Perhaps he's the reason I'm finally embracing the lighter side of decorating. Reds and yellows and greens have always been easy for me to decorate with, but throw in cool colors and I'm lost and confused. I see beautiful blues in Pottery Barn magazines and love them, but inevitably think that I could never pull it off.
Note: If you struggle with this as much as I do, check out this post from the Nester. She has some great tips!
So I started small.
I picked up this shutter at Round Top last week and was determined NOT to paint it red or green. The rug in the powder bath has plenty of colors to choose from, so I went with Sea Breeze Blue, a color (spray paint, of course!) that I found at Walmart. It's a beautiful color, but I have to admit, I was cringing while painting it. "What was I thinking?"...
But I actually think I like it! Take that back, I LOVE it! It's such a little thing, I know, but I think I'm finally embracing blue! Per Lindsay's suggestion, I hug this boxwood wreath on it, just too soften it up a bit. Plus, with it being green, I'm not completely abandoning my comfort zone. Baby steps, ya know?!