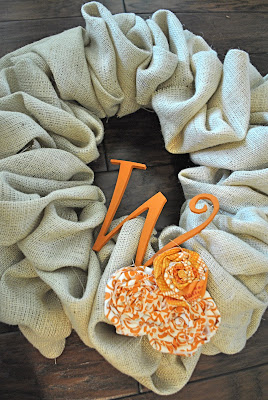
I finished my burlap wreath today!
I actually started it weeks ago but life, laundry, and dishes turned this easy project into a month long get-to-it-when-you-can kind of thing.
Which is how most things get done around my house.

Fellow Aggie fans, pay no attention to the orange.
It is NOT burnt orange and does NOT pay tribute to UT in anyway :)
Here's how I made it.
(Please forgive the picture quality. They were taken with my camera phone.)
I cut two 3 inch strips of burlap and wrapped my wreath,
using sewing pins at the ends to hold it in place.


I then cut the rest of my fabric into 12 inch wide strips.
I folded each strip lengthwise (so it's now only 6" wide) and
pinned the end of the material to the wreath. With the two rough edges down towards the wreath, I began making big S's out of the material.

So all you see is the pretty folds and not the frayed edges.
There's no rhyme or reason to the width of each S.
Just tried to keep it nice and full.

I added a W and fabric rosettes for color.
To see how I made the rosettes, click here.

I haven't figured out where I'm going to hang this beauty.
I guess that will be this month's project! Ha!


Hi Tiffany!! You won my Blog Design Giveaway!!! Go to this link for details: http://www.somethingswanky.com/2011/11/blog-design-giveaway-winners.html
ReplyDeleteAnd send me your email ASAP so I can get it to the blog designer!!! :)
Ashton
somethingswanky@gmail.com
Thanks for this simple tutorial! I've been searching for the 'how-to' on this specific burlap design for a bit now. Would you mind if I pinned this link on my pinterest board?
ReplyDeleteHow many yards of burlap does this project call for?
ReplyDelete