Thursday, January 17, 2013

My new chair!

I caught you up earlier this week on what my living room looks like these days. I've been so excited about the progress & the changes!  One thing that I knew once we bought a new sofa was that I was going to need a new chair for the room for some additional seating. 
 Remember what we had & sold...
Although it wasn't what this room needed layout wise - it was perfect for large gatherings and Sunday afternoon naps.  We could get at least 5 college students on it when we had different events and meetings at our house.

So, the search was on for a chair to add to the room.  Since the chair is going to go here...

I had several things to keep in mind.  The back of the chair would be seen from the entry way and the chair needed to both serve as a part of the conversation group & also be able to view the TV as well.  That left one option in my book.

I needed a swivel chair.

I don't know if you're searched for swivel chairs lately - but if you Google that term you get a lot of this turning up.
I'm pretty sure I don't have to tell you that those aren't exactly the style I am going after.

Thankfully I knew exactly what I was after and where I could get it!  Best Home Furniture makes some of the most comfortable chairs around and best of all you can customize the fabric.  This great store near The Woodlands, TX carries this line (as do most baby/nursery supply stores). 

Thankfully they had several for me to sit in and test out (and also bring my husband back to do the same).  I finally narrowed it down to two options.

I needed the chair to have a skirt to hide the swivel mechanism and these were the two best options.  It all came down to comfort and the Quinn won out! Unfortunately, it doesn't also recline which was something my husband was hoping for.  Note to Best Home Furniture since I know they read this blog (haha!)

Then I had to decide between hundreds of fabrics.  I knew I needed a pattern since my sofa & existing chair in the room are both solid.  I went back and forth between two but ultimately knew that if I went with a neutral tone I could punch in color with throw pillows and blankets and change more frequently.

So, in 4-6 weeks I'm excited to have this in my slowly improving living room.

(Sorry for the awfully grainy photo! It's a screen shot from the interactive website)

Do any of you own any Best Home products?
I'd love to hear from you!


Wednesday, January 16, 2013

Joss & Main

Have you checked out Joss & Main yet? I recently joined & added the app to my new iPad Mini I got for Christmas and started checking it out daily to see the deals.

I've seen several things that caught my eye and even things to text to friends to say "you need this" or "have you seen this?".

Well, I am excited to tell you that I made my first purchase! I can't wait to see how this pretty fixture will look in our laundry room!

It's the Fairfield Semi-Flush Mount from the Holly Mathis Interiors event.  Hurry on over and get one for yourself!  The sale ends on Thursday!


Check it out here.


Tuesday, January 15, 2013

Candyland Theme Birthday Party

Party time at That Village House!!

Today I'm sharing some photos from my twins' birthday party.  We had a lot of fun with the Candyland theme. 
I created these invitations after seeing something similar on the internet. God gave me the ability to "do" but not really the ability to "create" on my own.
Yes this party was in FEBRUARY OF 2012.... you could say I've been a bit behind in maintaining this blog.

I was inspired completely for this idea by this post on Pinterest from Parents Magazine. 
Isn't this so cute??  So, I took it and did the best I could in a very short period of time.  On a sidenote... why do birthdays always sneak up on me??

I created this banner using the same pattern from the invitation.  I made the lollipops from Dollar Store wrapping paper tubes spraypainted white, balloons, saran wrap and ribbon. {The lollipops stood up by tying a baggie full of coins to the balloon and dropping that down the wrapping paper tube.  I suggest using Helium filled balloons... this will make it work} 
 Candy bars are almost my favorite things at parties so I was excited to do this for this party.  Keep in mind that candy is not cheap.... So, my dream candy bar remained just that, a dream!
 We played pin the candy on the house which was a simple game I made using brown Kraft Paper.  I drew a horrible simple Gingerbread house on it and Googled candy images and cut them out for the kids to "pin" on the house.
I made a Candy Walk for the kids to play.  I bought 12x12 pieces of Candyland colored scrapbook paper and taped them to the floor in a circle.  The idea was that the kids would walk around the circle and when the music stopped we would draw a color and if that was their color they would win a prize.  I never got around to making or buying prizes so when they "won" they got a turn at the candy bar.  That helped limit the number of kids swarming around the table and gave the adults helping a little more control guidance with managing the candy quantity!


The candy bar included lots of fun candy, fruit snacks & so parents didn't hate me to sweeten the deal for the parents I bought a bunch of toothbrushes from SmileMakers so each child could take one of those home too!


Lastly, we had the kids make fruit loop necklaces.  I needed an activity to keep them occupied and entertained for a while since the whole party was to be inside (remember... February).  Unfortunately, I didn't account for the boys who would have NO interest or the other kids who were just not interested.  So, that meant that I had a handful of boys and girls running wild until the next "scheduled" activity began.  Nightmare for a "scheduler" like myself.  

Note: make sure your fruit loops aren't the special edition with the red "figure 8" shapes.  

Finally we had cupcakes that we bought from Sams because this Momma was tired of making decorations that nobody only I cared about. :)
Another note: make sure you order your cupcakes ahead of time.  Sams doesn't always have plain white icing cupcakes ready for pick up.  I only had a major slight meltdown when my hubby came home with Spiderman cupcakes and these with the sprinkles.  THANK goodness the sprinkles worked.  I really would have had a royal fit had my inlaws not been there to witness it!

All in all, it's ONLY a party... Nobody really cares but the mom giving the party.  Everyone else just wants to have a good time.  I have to admit I've had party envy over some of the fantastic set ups that some of you mom's throw.  I have to remember that it's not a time to shine and make myself look good (or fail miserably at trying). 

It's about celebrating these little ones who are growing up TOO fast!
Now only a little over a month until their 5th birthday.  Maybe it won't take me a year to blog about that one! :)

Linked here:

Monday, January 14, 2013

Living room progress. Long time coming.

Happy Monday, everyone!

My living room is slowly taking shape and becoming all I dreamed it to be back when it looked like this.


Whew... I hadn't looked at these photos in a LONG time.  Yes, this is how the house looked when we moved in! That's what you get when you buy a foreclosure, folks!

So, then we lived with furniture that didn't work well for the room for over a year. 

We had a love/hate relationship with our sectional.  LOVED the feel and comfort and the fact that the hubby and I could BOTH stretch out and lay down on it.  HATED the worn down torn up backside and the awkward layout it created for the room.  Okay, let's be real - that was only something I hated.  Hubby couldn't have cared less. :)

Then we had the wall issues... the couch wasn't a true "L" shape so it didn't fit into the corner which left an awkward space in the back.  I pulled the couch off the walls to bring it into the middle of the room.  I could never figure out just want to do with the blank walls.  I can't find pictures of the room with my shutters on the wall (which I hung up to break up the blankness).
   So I told you about our couch hunt & my score on Craigslist.


I thought I'd give you a peek at what the room is looking like now so you can see there truly has been some progress made! YAY!
 Oh and just so you also know what I deal with when I try and take photos....
Never a dull moment... our sweet Hallie.
Oh and the table she's standing on is our new coffee table we built! I'll tell you more about that in a later post. 

What about y'all? Any of you living with a room that is a work in progress? After a year and a half ours is finally coming together!


Thursday, January 10, 2013

House Goals 2013

Well it's a new year and we are still in the same house! And the miracle is that we don't have plans to move any time soon!  That's big news for us.  We've lived in this city for almost 5 years and have lived in three houses.  You've seen some of the progress we've made at our current house (1/2 years and counting!). 
The Kitchen
The Kids Bath
The Dining Room

Of course every project costs $$$$ so we try and space them out and tackle them when we have funds (and energy since we are DIYers).  I thought it would be fun to take note of all the projects I would like to do over this year (and the years to come) along with some pictures that serve as inspiration.

Guest Bath Renovation
*wood countertop
*white vessel sink
*white cabinets
*tile backsplash (maybe subway tile?)


Master Bath Renovation
ANYTHING would be better than what we've got going on in there now.  Highlights... new countertops, sinks, faucets, shower & tub.  
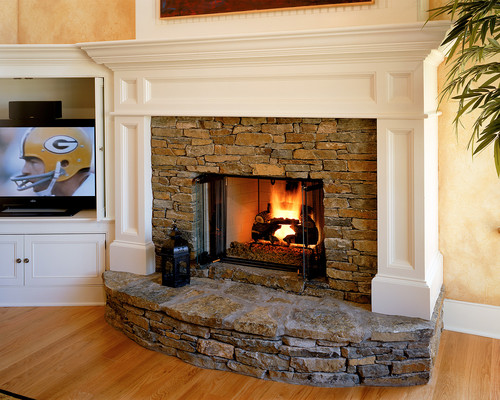
Fireplace Overhaul
*remove the 90's brass & glass screen,
*de-traditionalize the mantle
*get rid of the tile & add stone or brick

House Trim Painted
I want to paint a shade of gray to make our brick color less "pinkish"
After seeing THIS renovation I was inspired -- our house is basically a 2 story version of the one in the picture.  Seems to be built in the same time period using a similar brick and it's traditional like this one. 

Garage Door Updated
I'd love a new one... but the hubby has drawn the line there (so far). So, I'm thinking of faux finishing it... but it may just end up painted the same color as my *wishful* gray.


Fingers crossed that something from this list can get checked off the list!
You can find all these pictures and their sources on my pinterest board.

Monday, January 7, 2013

Kids Bathroom Reveal

I hope you have had a great holiday season! Our family spent 10 days traveling and once we returned home our son came down with a vicious virus that lasted 4-5 days.  Brutal way to start a new year!

However, now that things are settling down I am hoping to knock out a few projects that I have on my to-do list for 2013!

First up - I'm ready to show you our kids bathroom renovation.  While it only involved paint and trim, it created a pretty big change and I'm really happy with how it turned out.  Granted, I still need to get some new towels, replace the faucet & add some "decor" (which is pretty hard for a kids bathroom) it's a whole lot better than it started!


We painted the whole thing top to bottom.... and there is a LOT of cutting in going on in here.  The easiest and most dramatic part of the change was painting the cabinets.  For the prep work I used Krud Kutter to clean the surfaces.  I intended to get the Krud Kutter that is a cleaner AND deglosser...but I bought the wrong kind.  So, I went over everything with this liquid deglosser from Lowes.
 We set up our assembly line in the garage & I got to work priming everything.

I used a small foam roller & a paintbrush for this job.  The foam roller was perfect and left a great finish.  The brush came in handy really only for the crevices in the door insets.

Let's take a stroll down memory lane and see the before & afters!


So, so much better!

Details:
I ended up doing a coat of primer & two coats of color on the cabinets.  We used Sherwin Williams paint and had them color match to Valspar Mountain Smoke.

The walls are Olympic Gray Beige. The handles and hinges are all new and came from Home Depot.
Linked here:
Handy Man, Crafty Woman
Someday Crafts
Not JUST a Housewife
A Bowl Full of Lemons
House of Hepworths

LinkWithin

Related Posts with Thumbnails