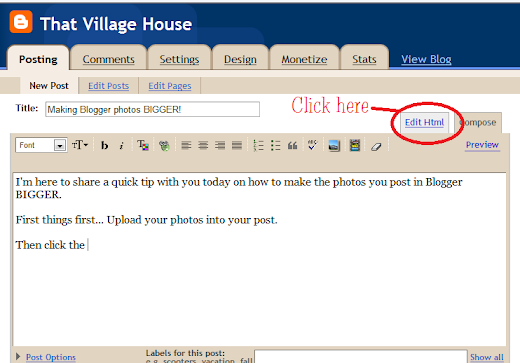
First things first... Upload your photos into your post.
Then click the Edit HTML tab.

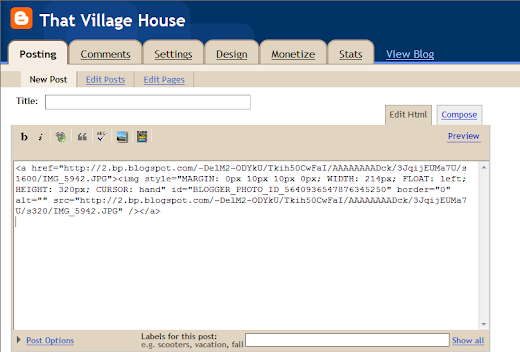
If you've uploaded a photo you should see something like this.

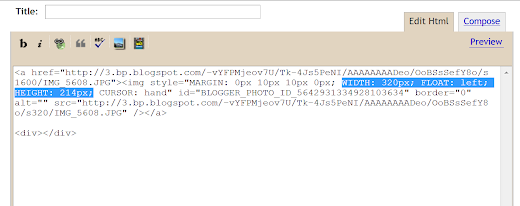
Find the text shown below in the highlighted area & delete.
Then click the Edit HTML tab.

If you've uploaded a photo you should see something like this.


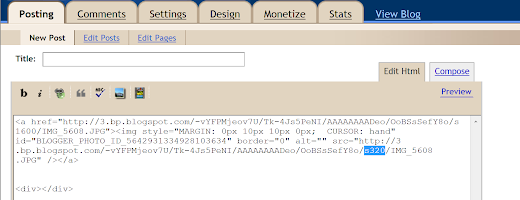
Next change the area shown below in the highlighted area to read s520 (you may need to adjust this depending on your margin area that you've got going on in your blog layout. I started with s420 and kept increasing the number until it was the size I wanted).


That's it! You should now see larger pictures when you post your blog (or when you click back over to the compose tab).
Good luck and hopefully this helps you out!


0 comments:
Post a Comment
We love comments! Thanks for taking the time to give us feedback.